How To Build Your Own Deadlift and Power Rack Platform
Your gym should be equipped for heavy deadlifting. And if your gym is one of those places that isn't, find a better gym.
- Mark Rippetoe
Time to roll up your sleeves
I think Mr. Rippetoe was on to something when he said that. Here is a way to make sure your gym (or home gym) is one of those better gyms. These are step-by-step instructions on how to build your own 8'x8' deadlift and power rack platform. These platforms are easy to build and they protect your gym floor from unwanted damage. We have three of these platforms in Massenomics Gym, and they have all withstood repeated heavy poundings from some big deadlifts. You'll like the way they look, I guarantee it.

Before you get started, make sure to click the picture and get some of our apparel, perfect for construction.
Materials needed
Four 4'x8' 3/4" thick sheets of OSB. Link to Menards - $75
One 4'x8' 3/4" thick sheet of smooth plywood. Link to Menards - $30
Two 4'x6' 3/4" thick "horse stall" rubber mats. Link to TSC - $85
One box of 1-1/4" screws. Link to Menards - $5
Total cost = $200
Tools Needed
Cordless drill
Reciprocating saw
Pencil/Marker
Tape Measure
Build time
For two competent builders the process will take 1-2 hours.
step-by-step instructions
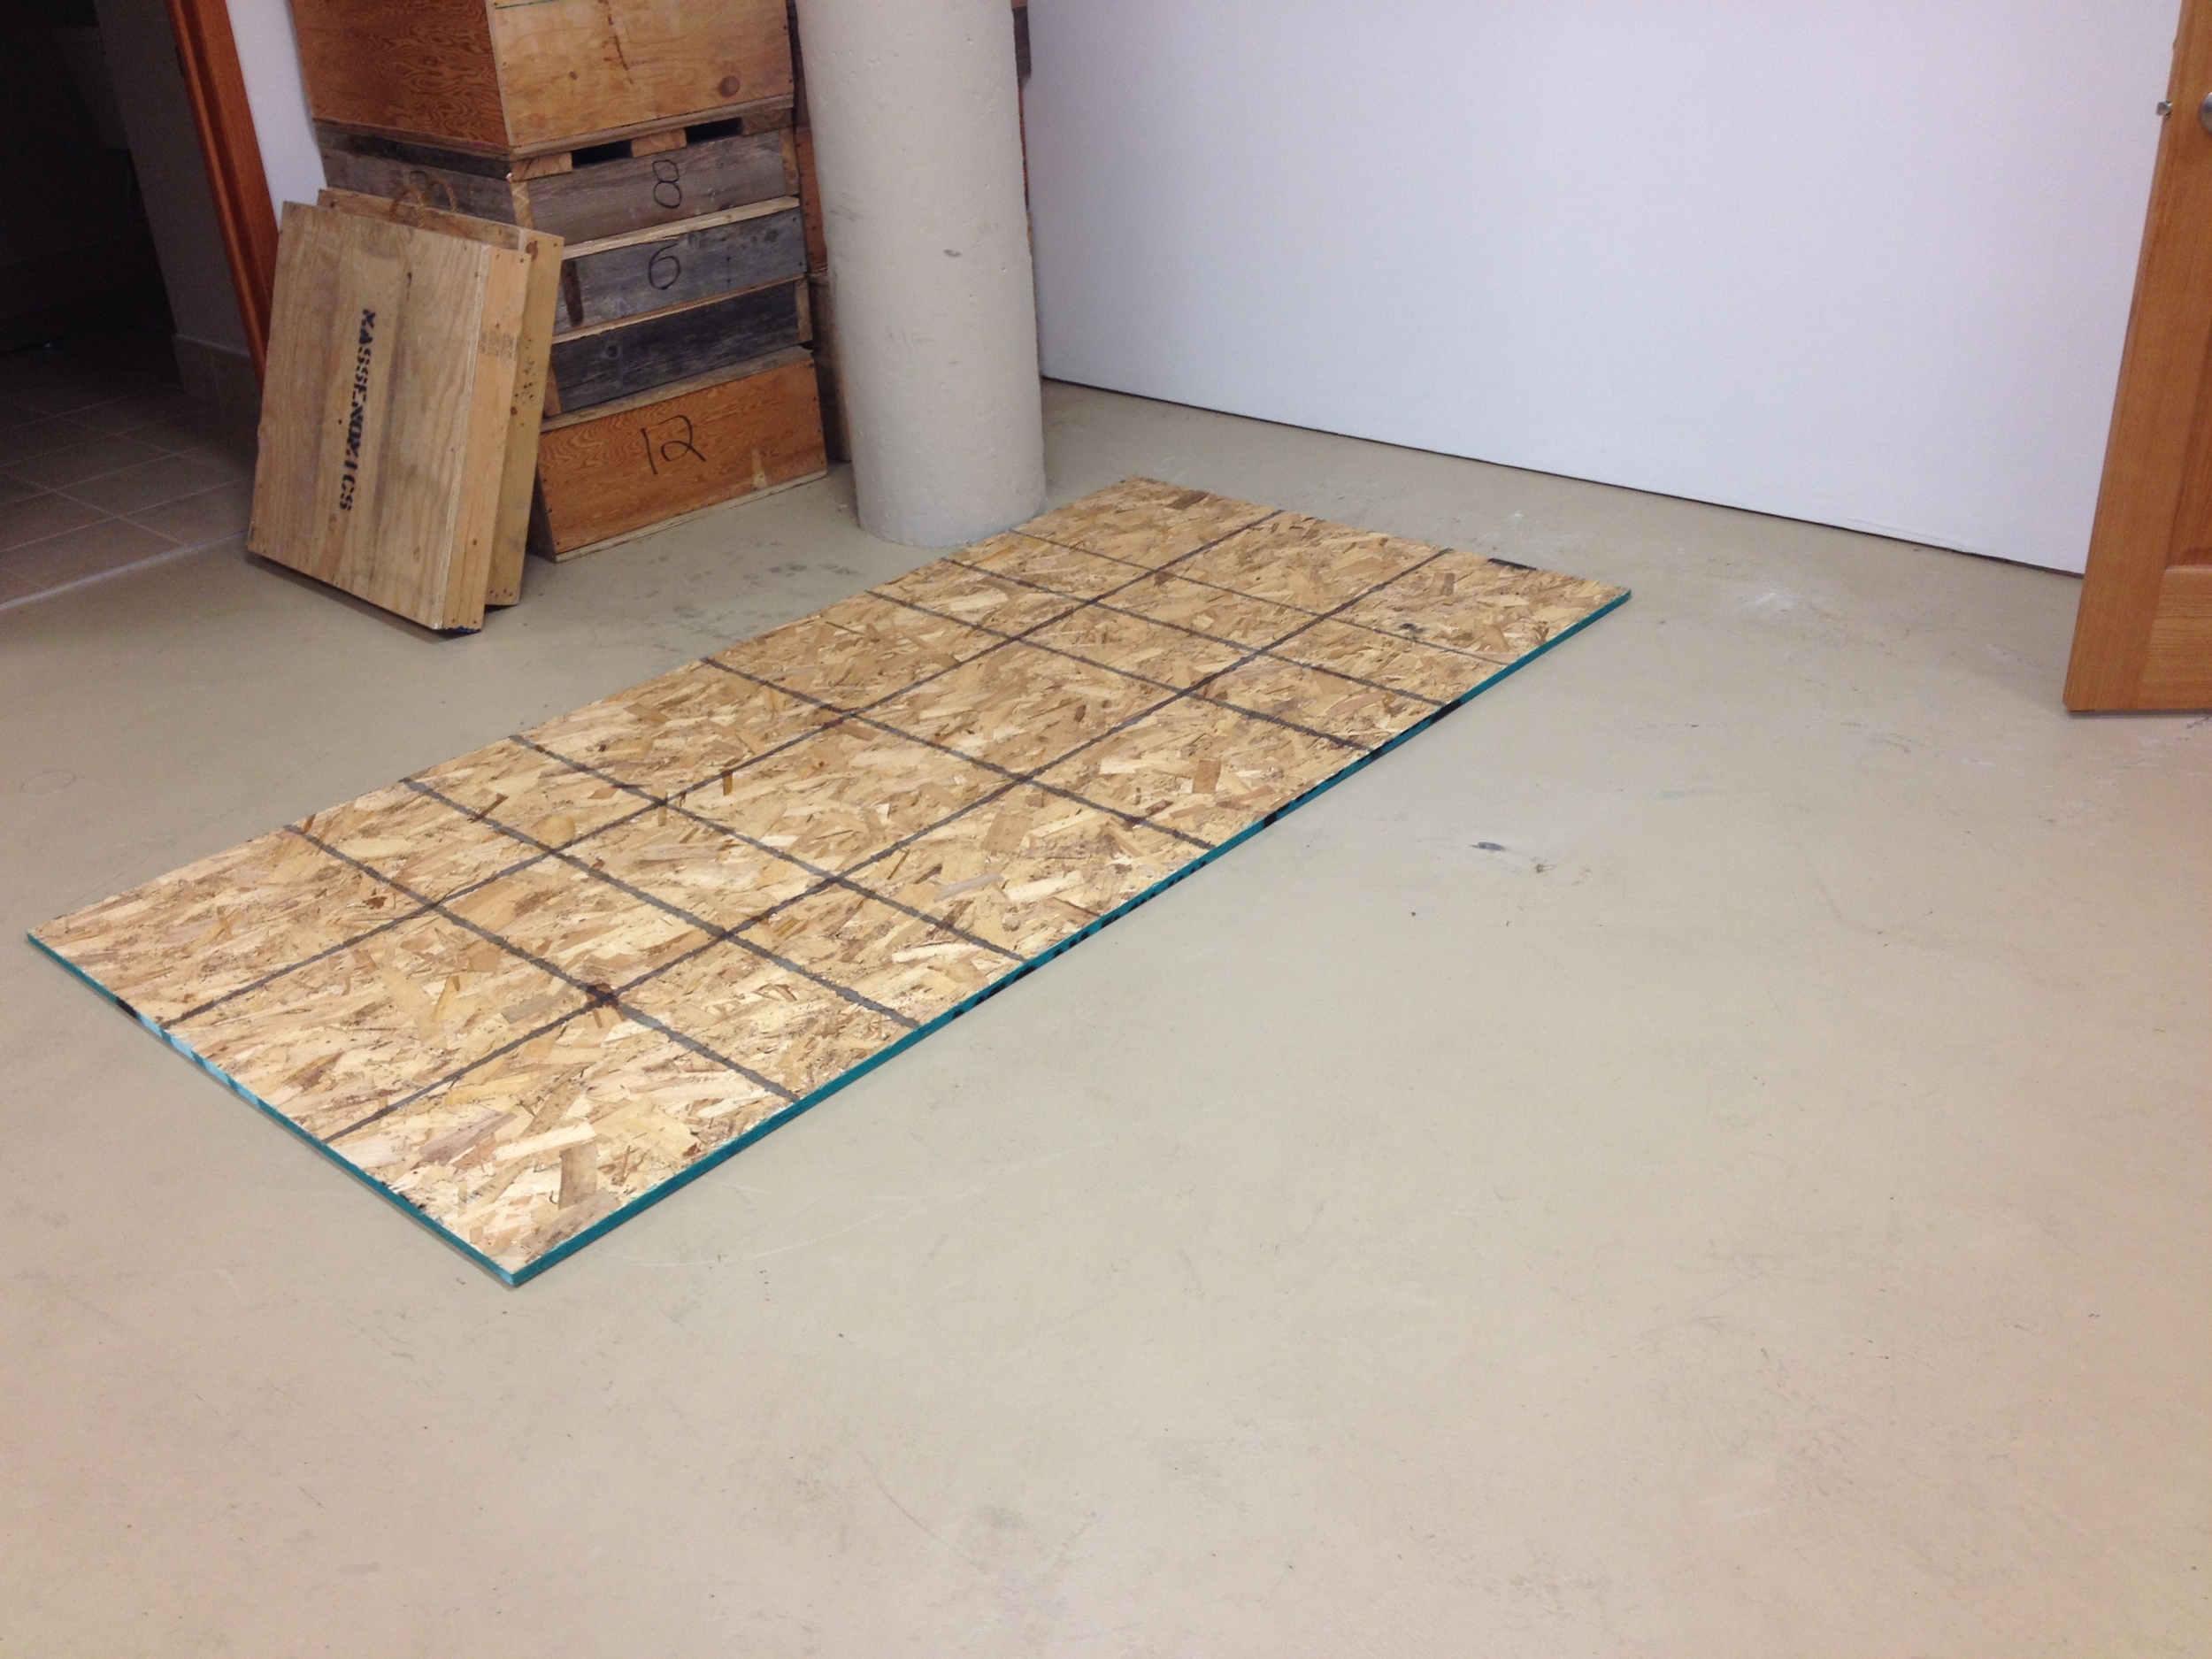
Sheet 1
Decide on the location of the platform, and lay out your first sheet of OSB. You want to lay this out as close as possible to the platform's final intended position, because the platform becomes very heavy and difficult to move once fully constructed.
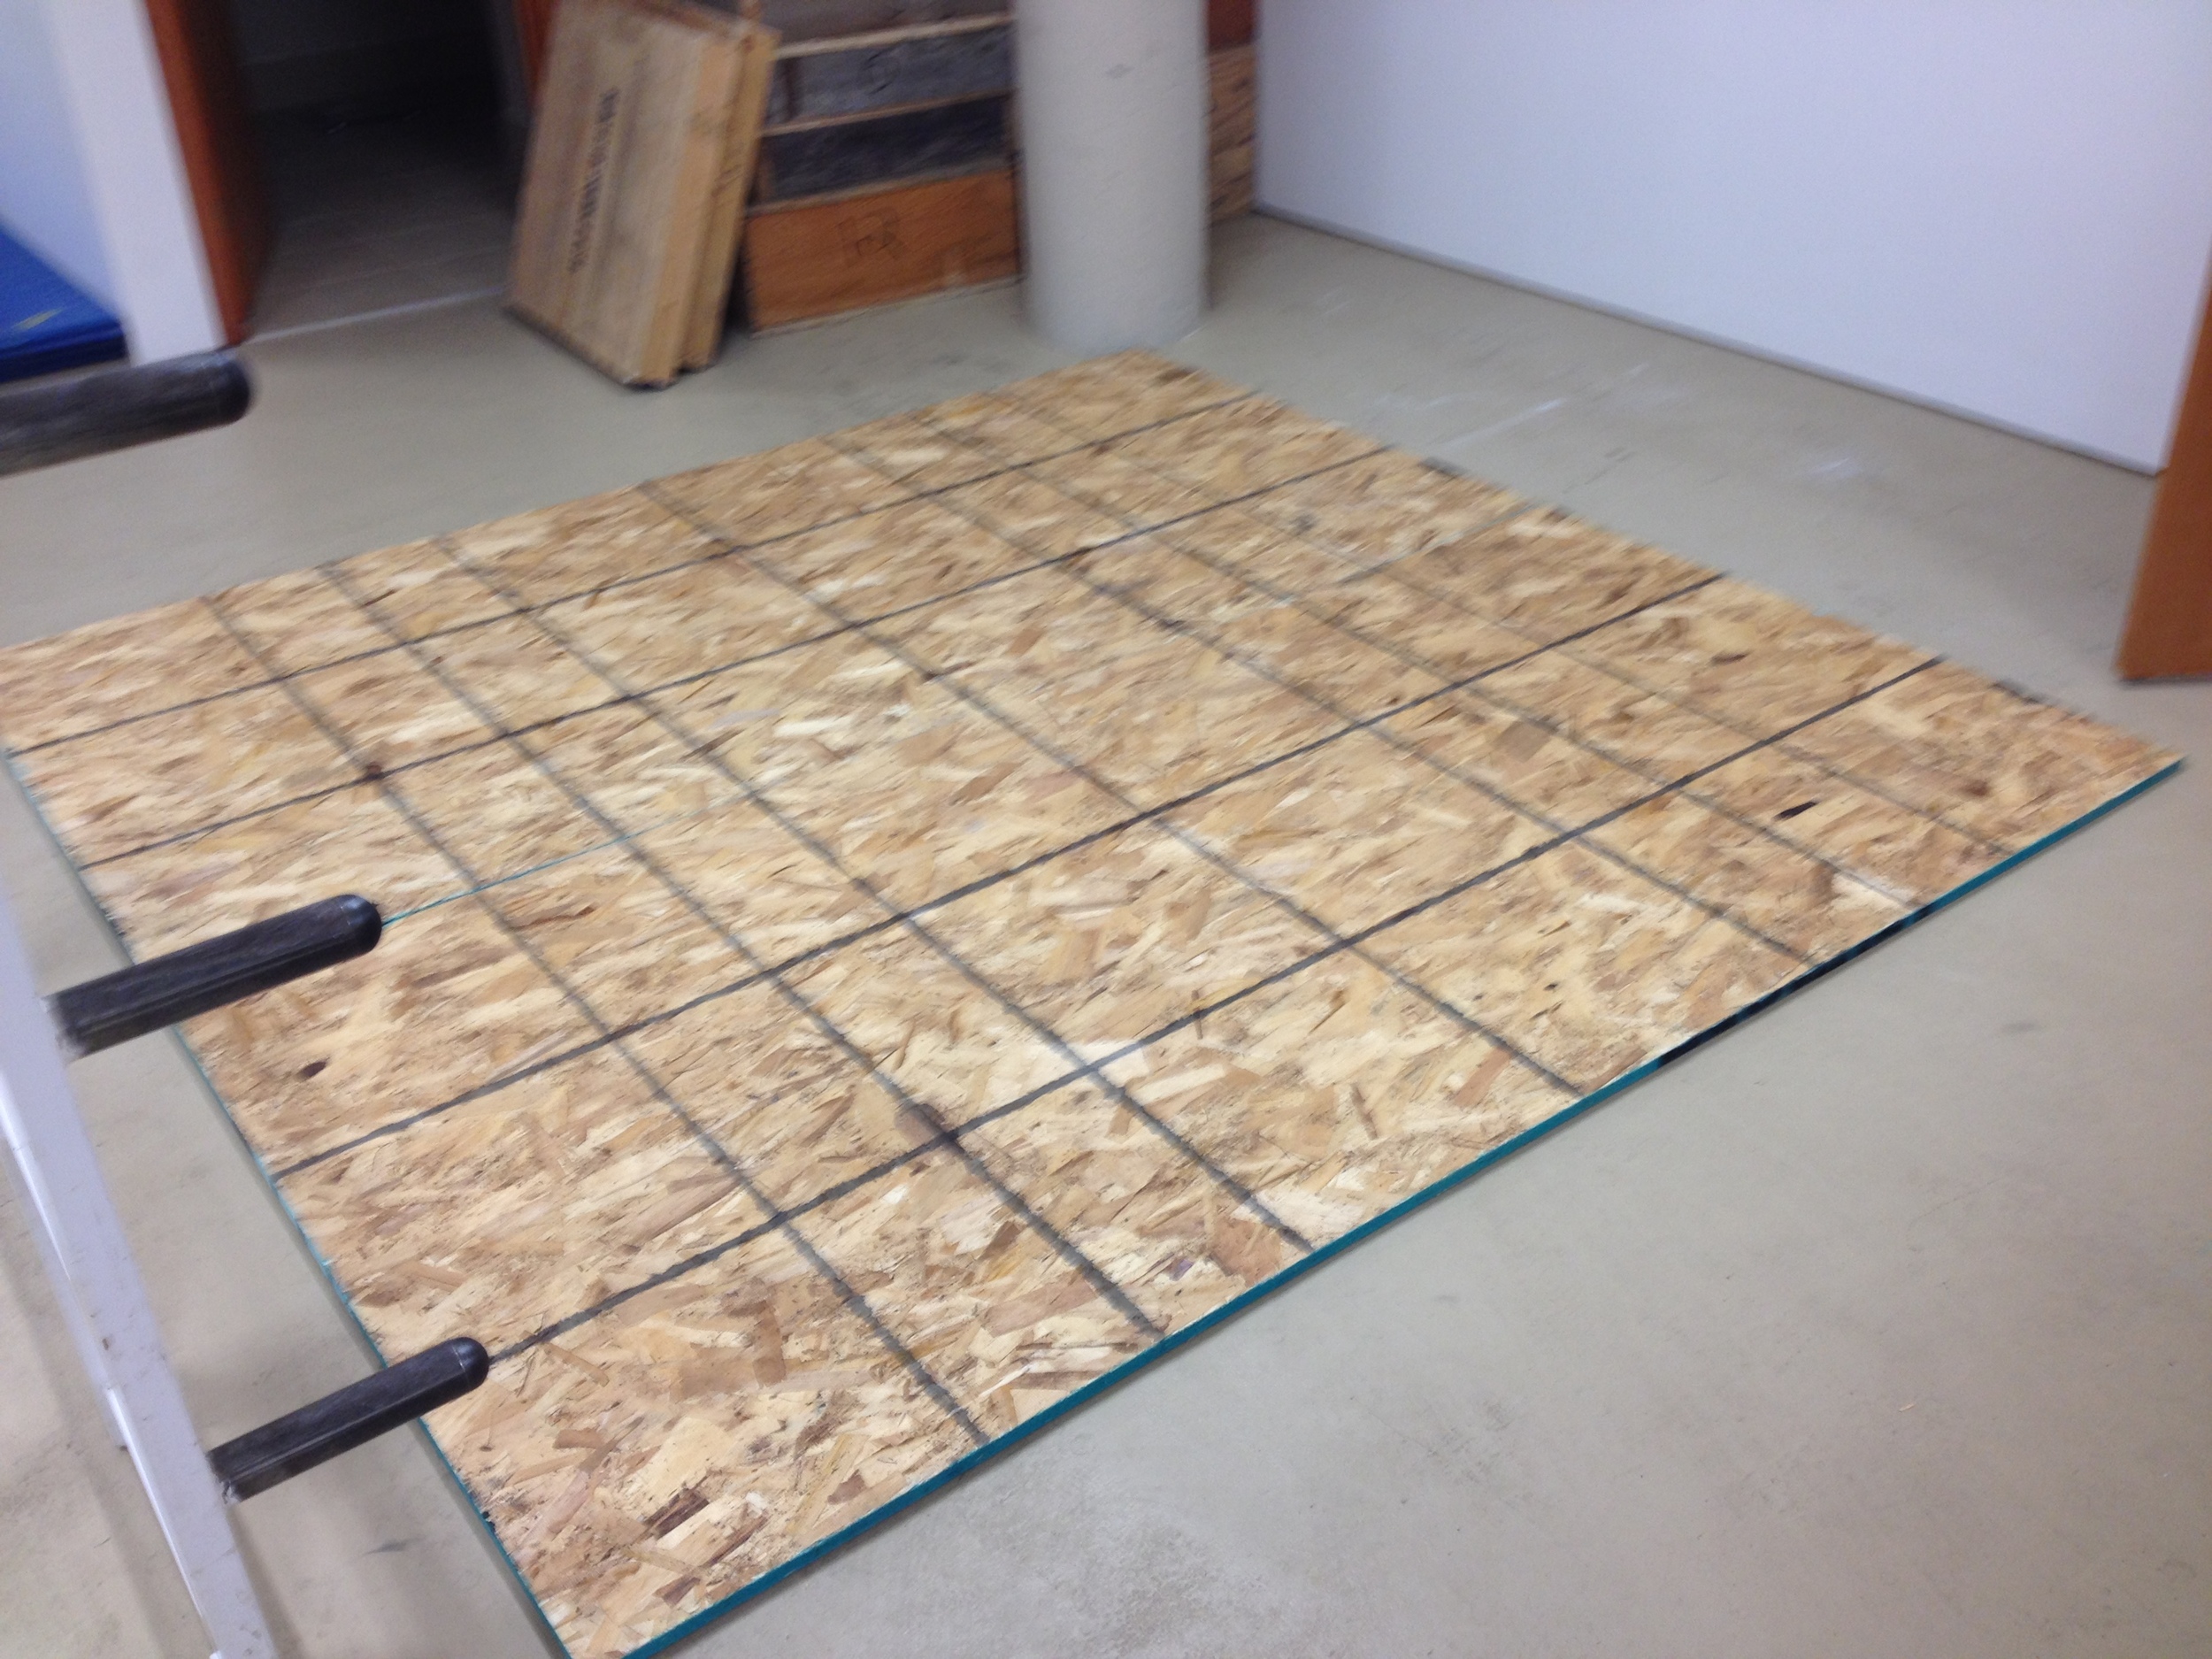
2nd Sheet
2. Lay down your second sheet of OSB, butting it up length wise to the first sheet. Make sure the boards are flush, and square with any neighboring walls. Measure the distance from the nearest wall with a tape measure to help square. This sheet completes the first layer.
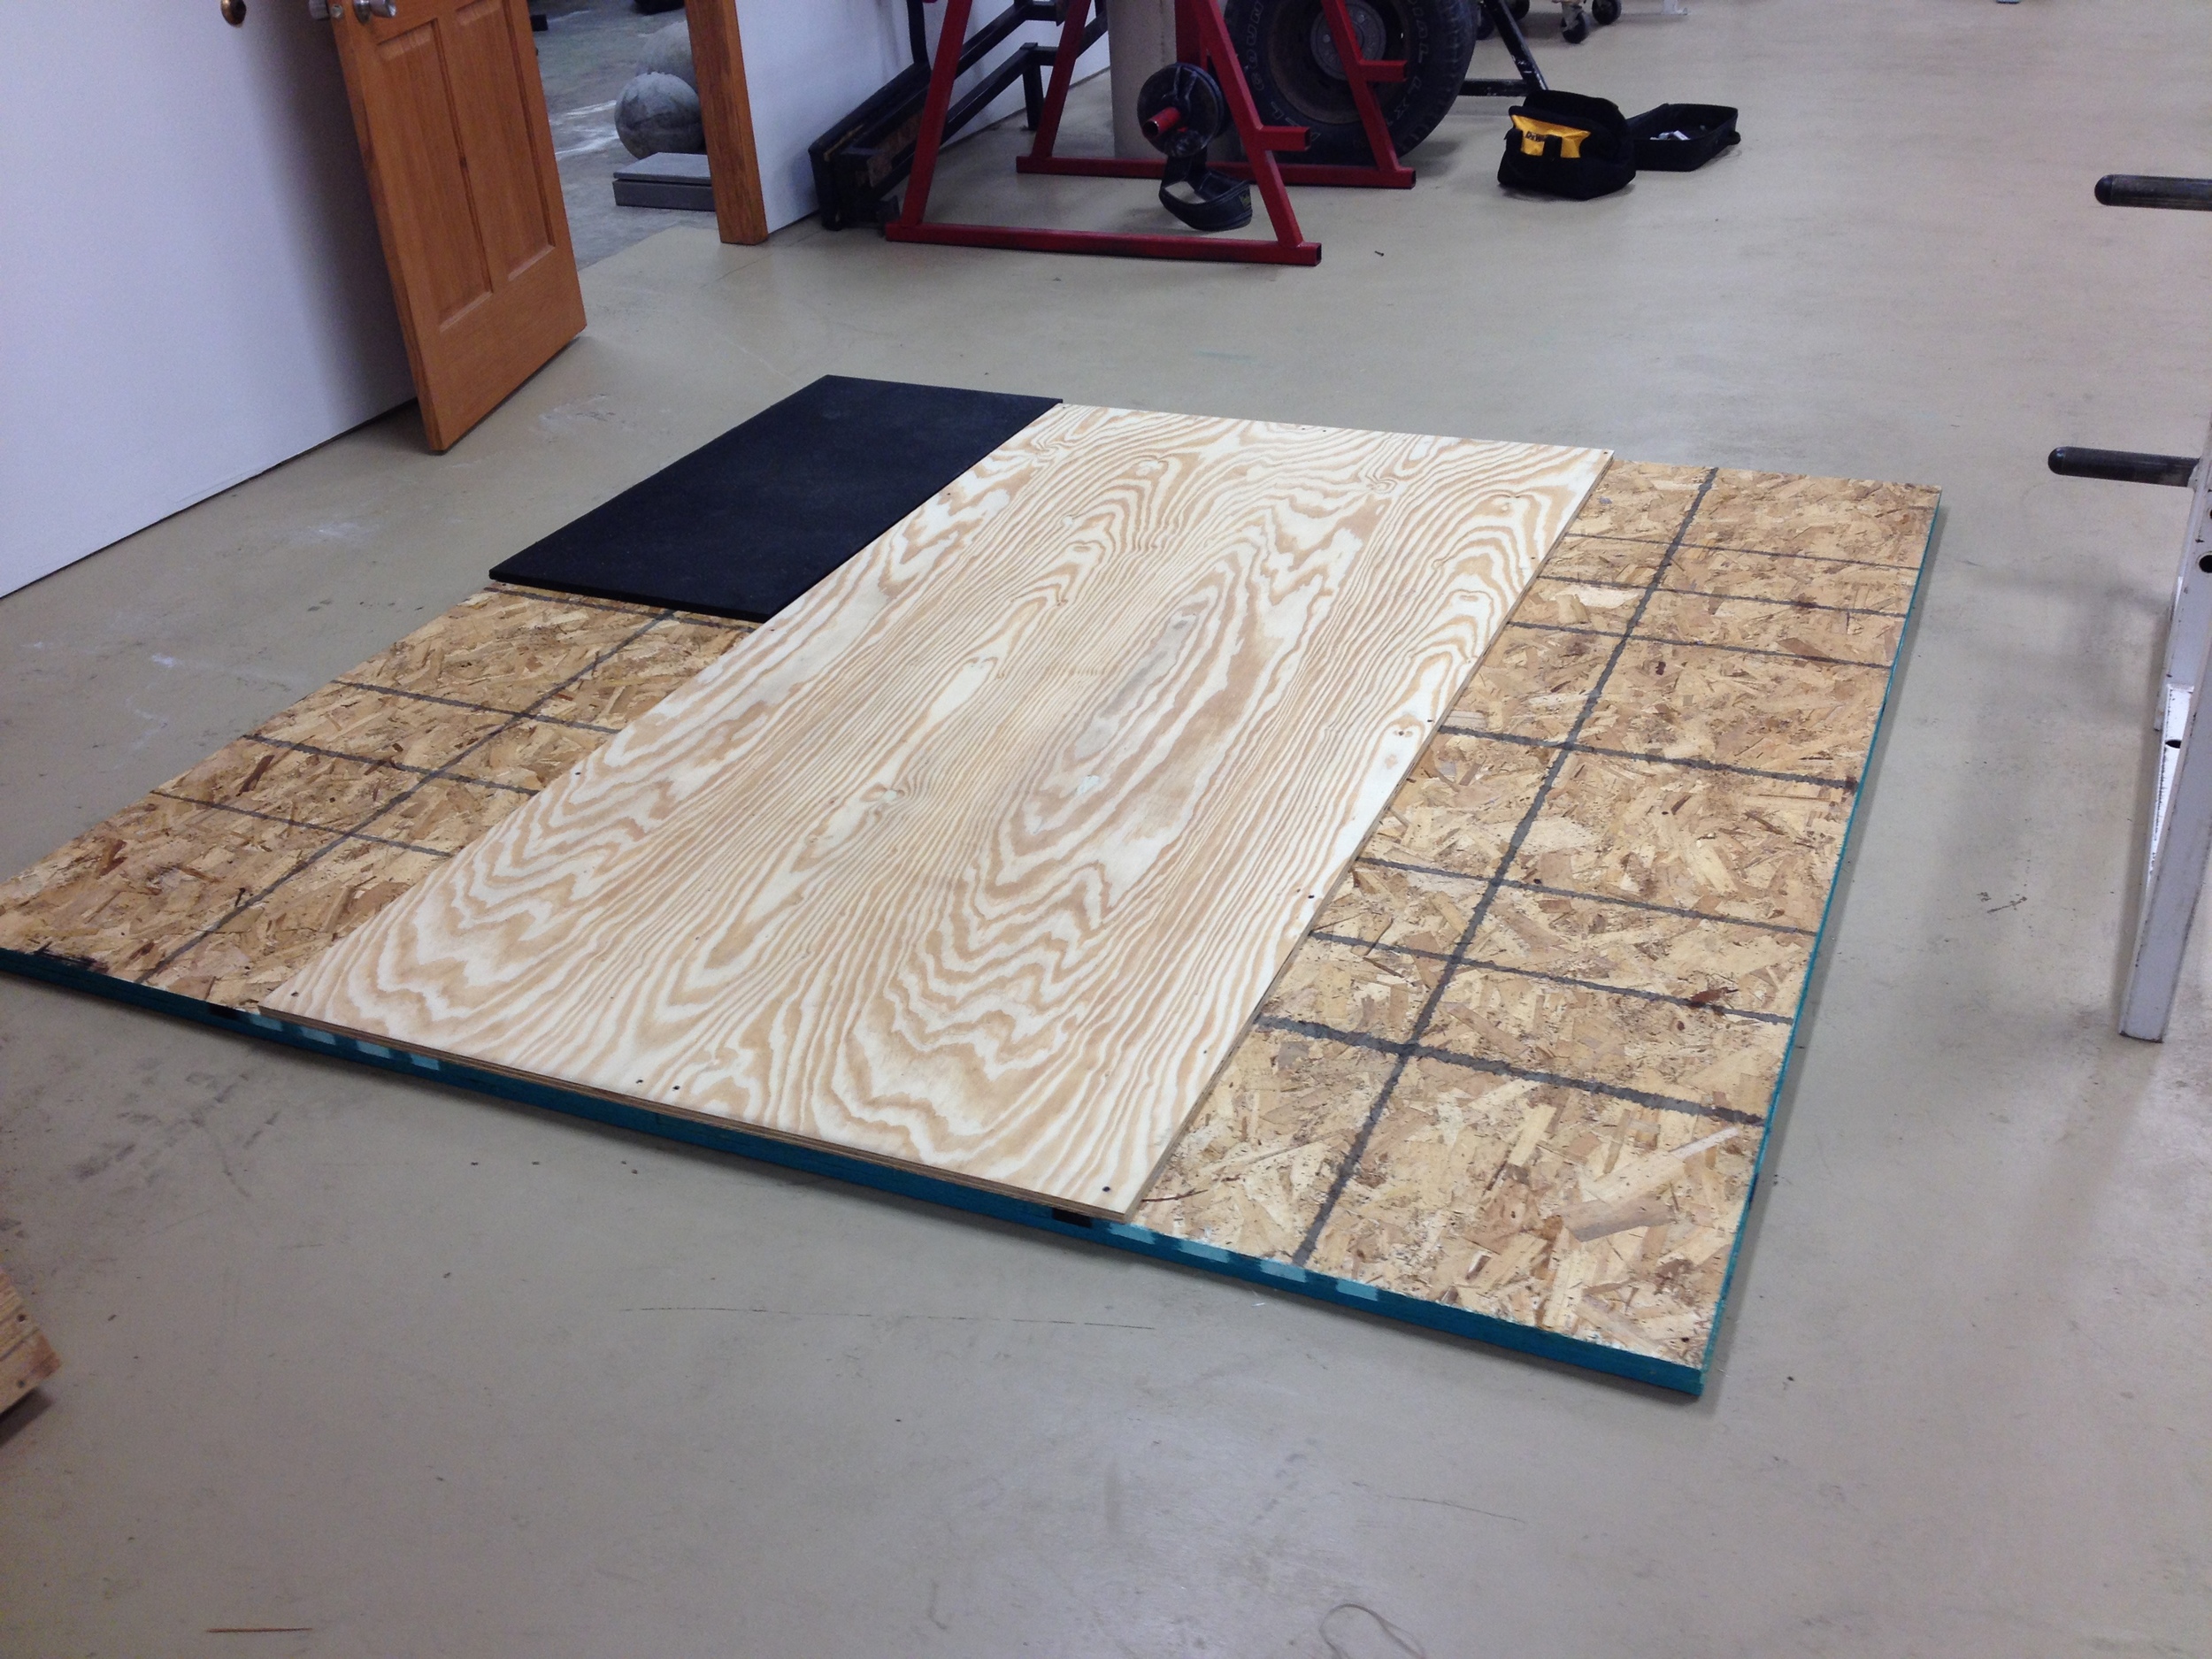
3. Lay down your third sheet of OSB. This will be the second layer. This should run perpendicular to the sheets in the first layer, covering half of each of the first two.
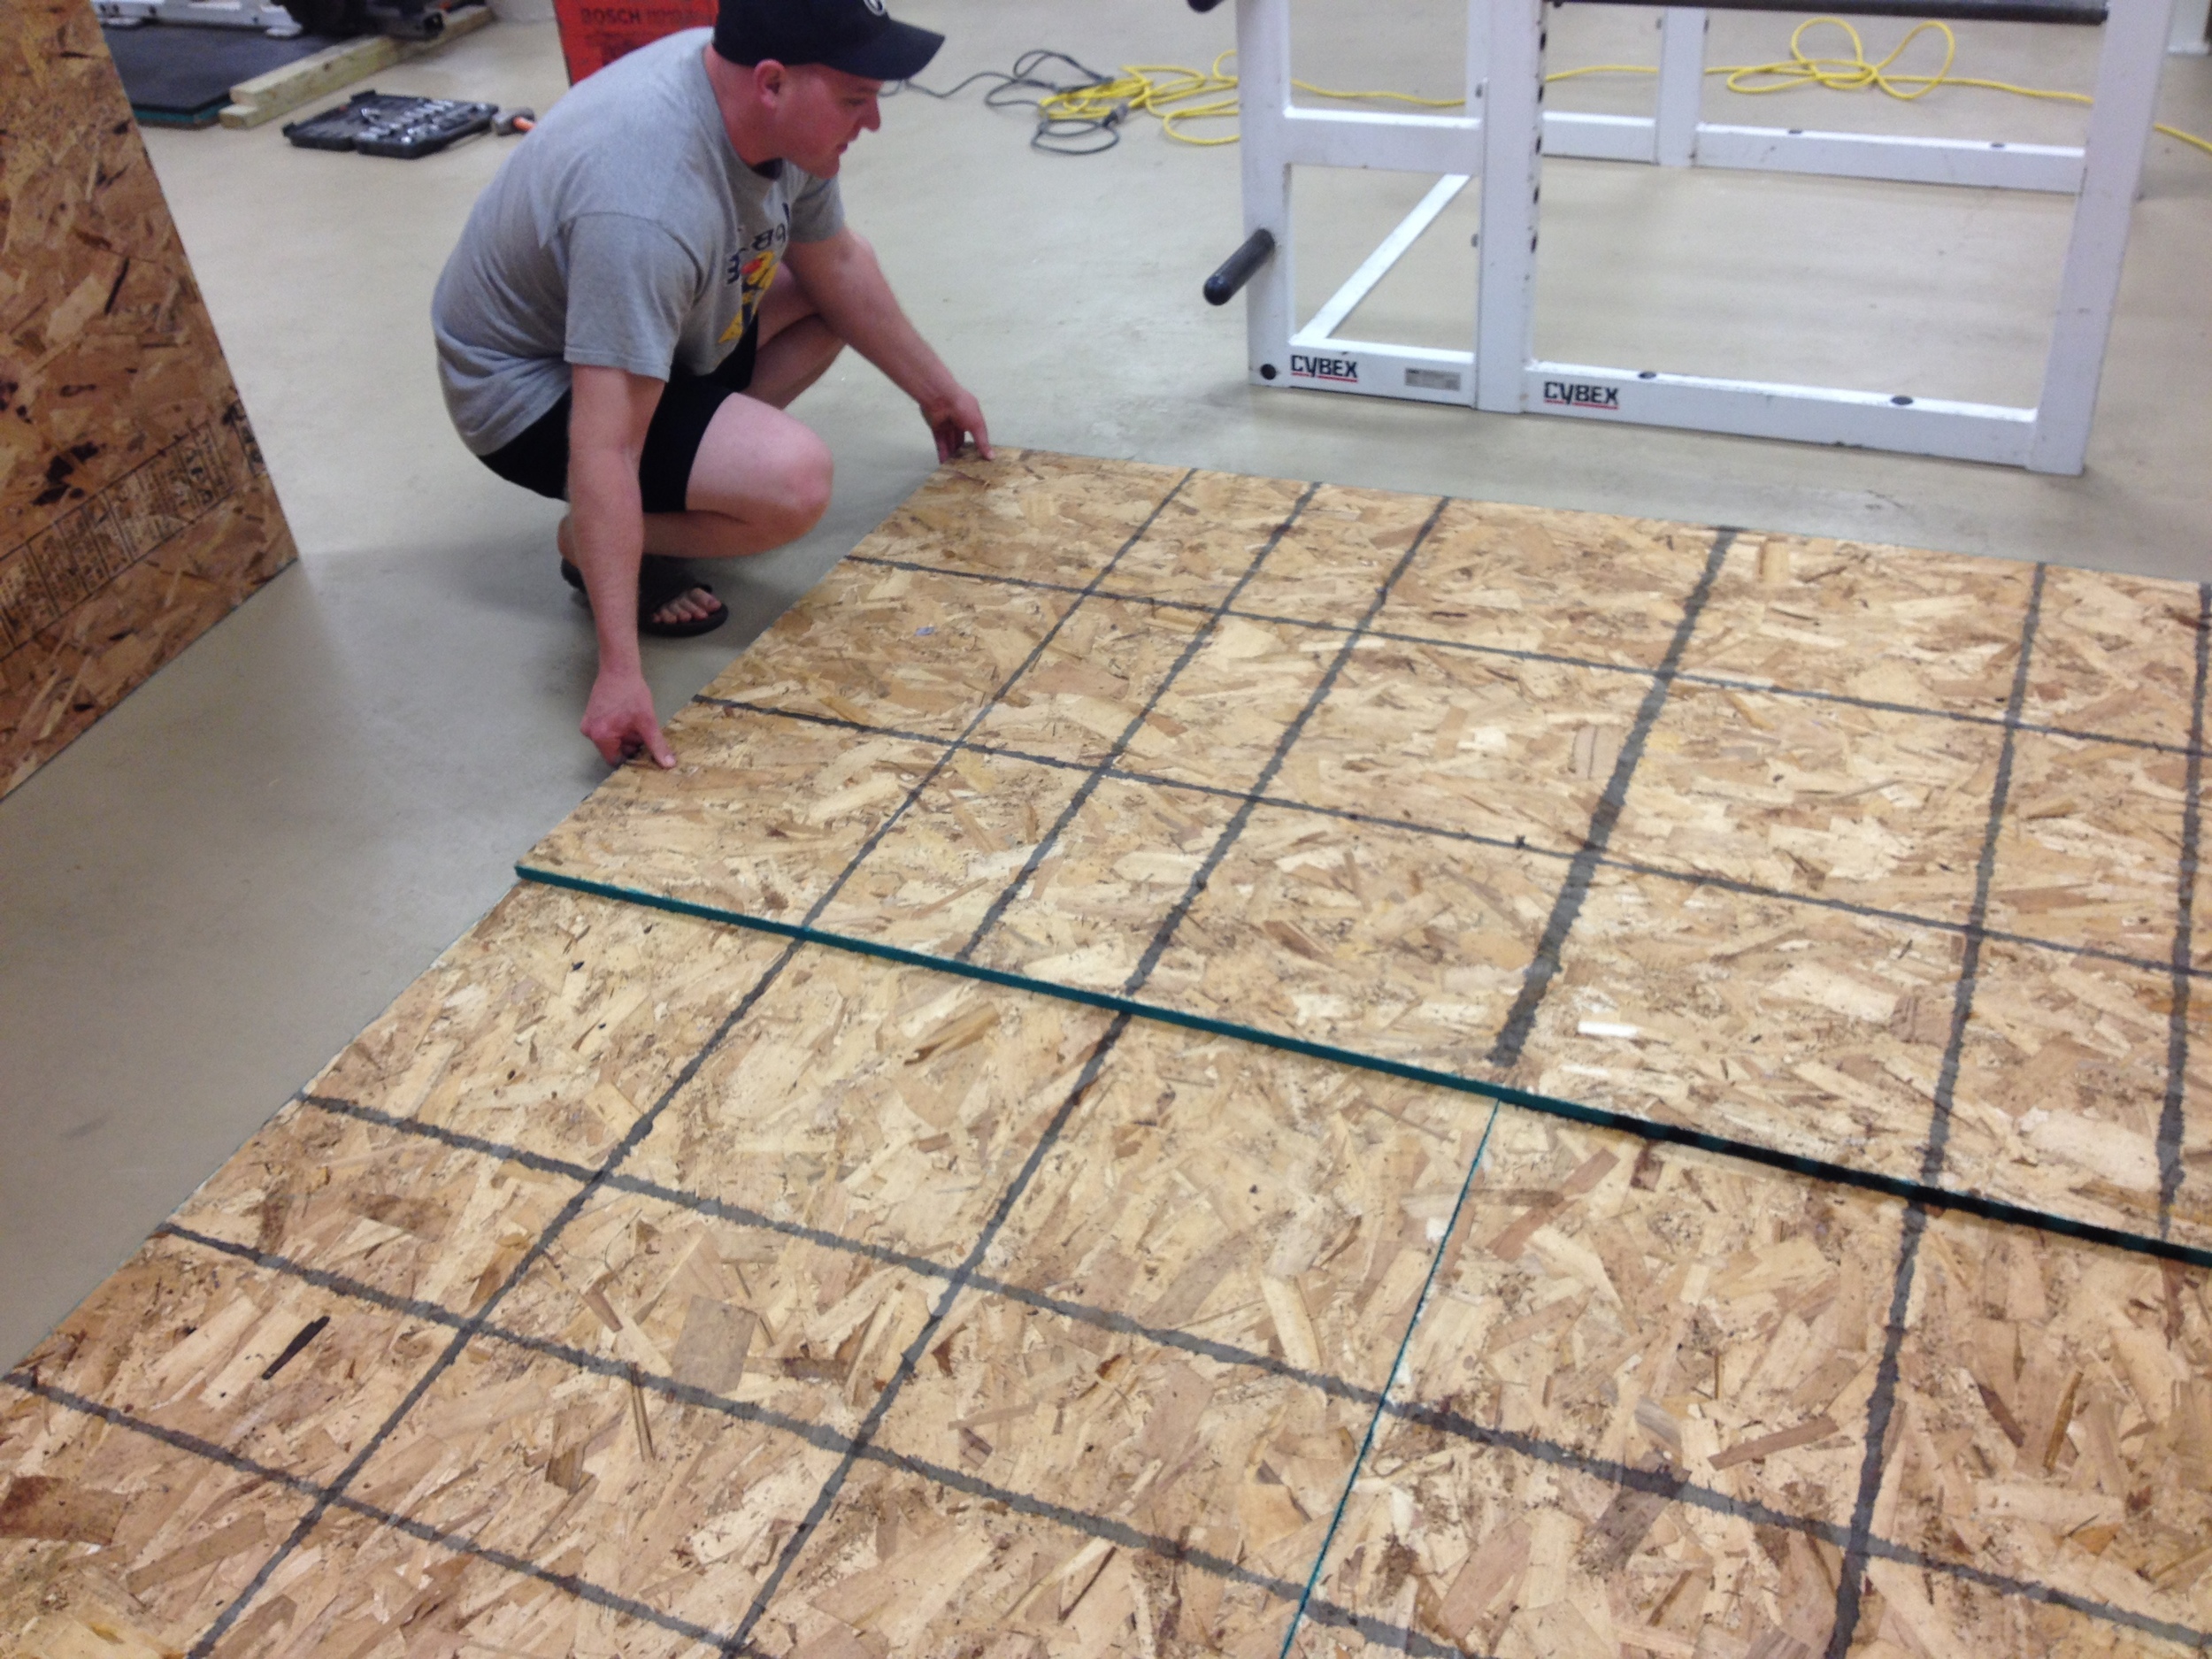
3rd Sheet
4. Lay the fourth sheet in place to complete the second layer. Again, check to make sure all sheets are flush on all four sides.

Time to screw
5. Screw the two layers together with the 1-1/4" screws. About 10 screws per sheet evenly spaced around the border of each top sheet will be sufficient. Make sure the screws are screwed in flush. You do not want any heads sticking up. (Any heads sticking up would cause problems for the third and final layer.)

The plywood
6. Lay the plywood sheet perpendicular to the top layer of OSB sheets. Make sure the nicer side of the plywood is facing up. This will sit in the center of the platform, equal distance from both edges. Use a tape measure and marker to help center the plywood. It will be roughly 24" from each side. Keep the ends flush with the edges of the OSB.
7. Screw down the plywood using the same 1-1/4" screws. About 10 screws evenly spaced around the outside edge of the sheet is all that you need. Screw them all in flush.
8. Re-measure the distance from the sides of the plywood to the edge of the platform on each side. Check each side, they may be slightly different. Again, they should both be close to 24", maybe slightly less. These measurements will be used for cutting the rubber mat.
9. Now onto the mats... You will need to end up with four pieces of rubber about 2' x 4' to fill in the edges of the platform. It is ideal to have one factory cut edge on each 2' x 4' section, so you will get two good pieces from each 4'x6' starting piece, and have two leftover pieces total.
Measure and mark using a straight edge, then cut with the reciprocating saw. It's best to have two people for this part of the process. One person to hold the mat up off the floor, and the other to run the saw. Try not to cut through the holder's fingers. He will need those to complete the last couple steps. (If you don't have a reciprocating saw you can score the mats with a box cutter, but that method kind of sucks.)
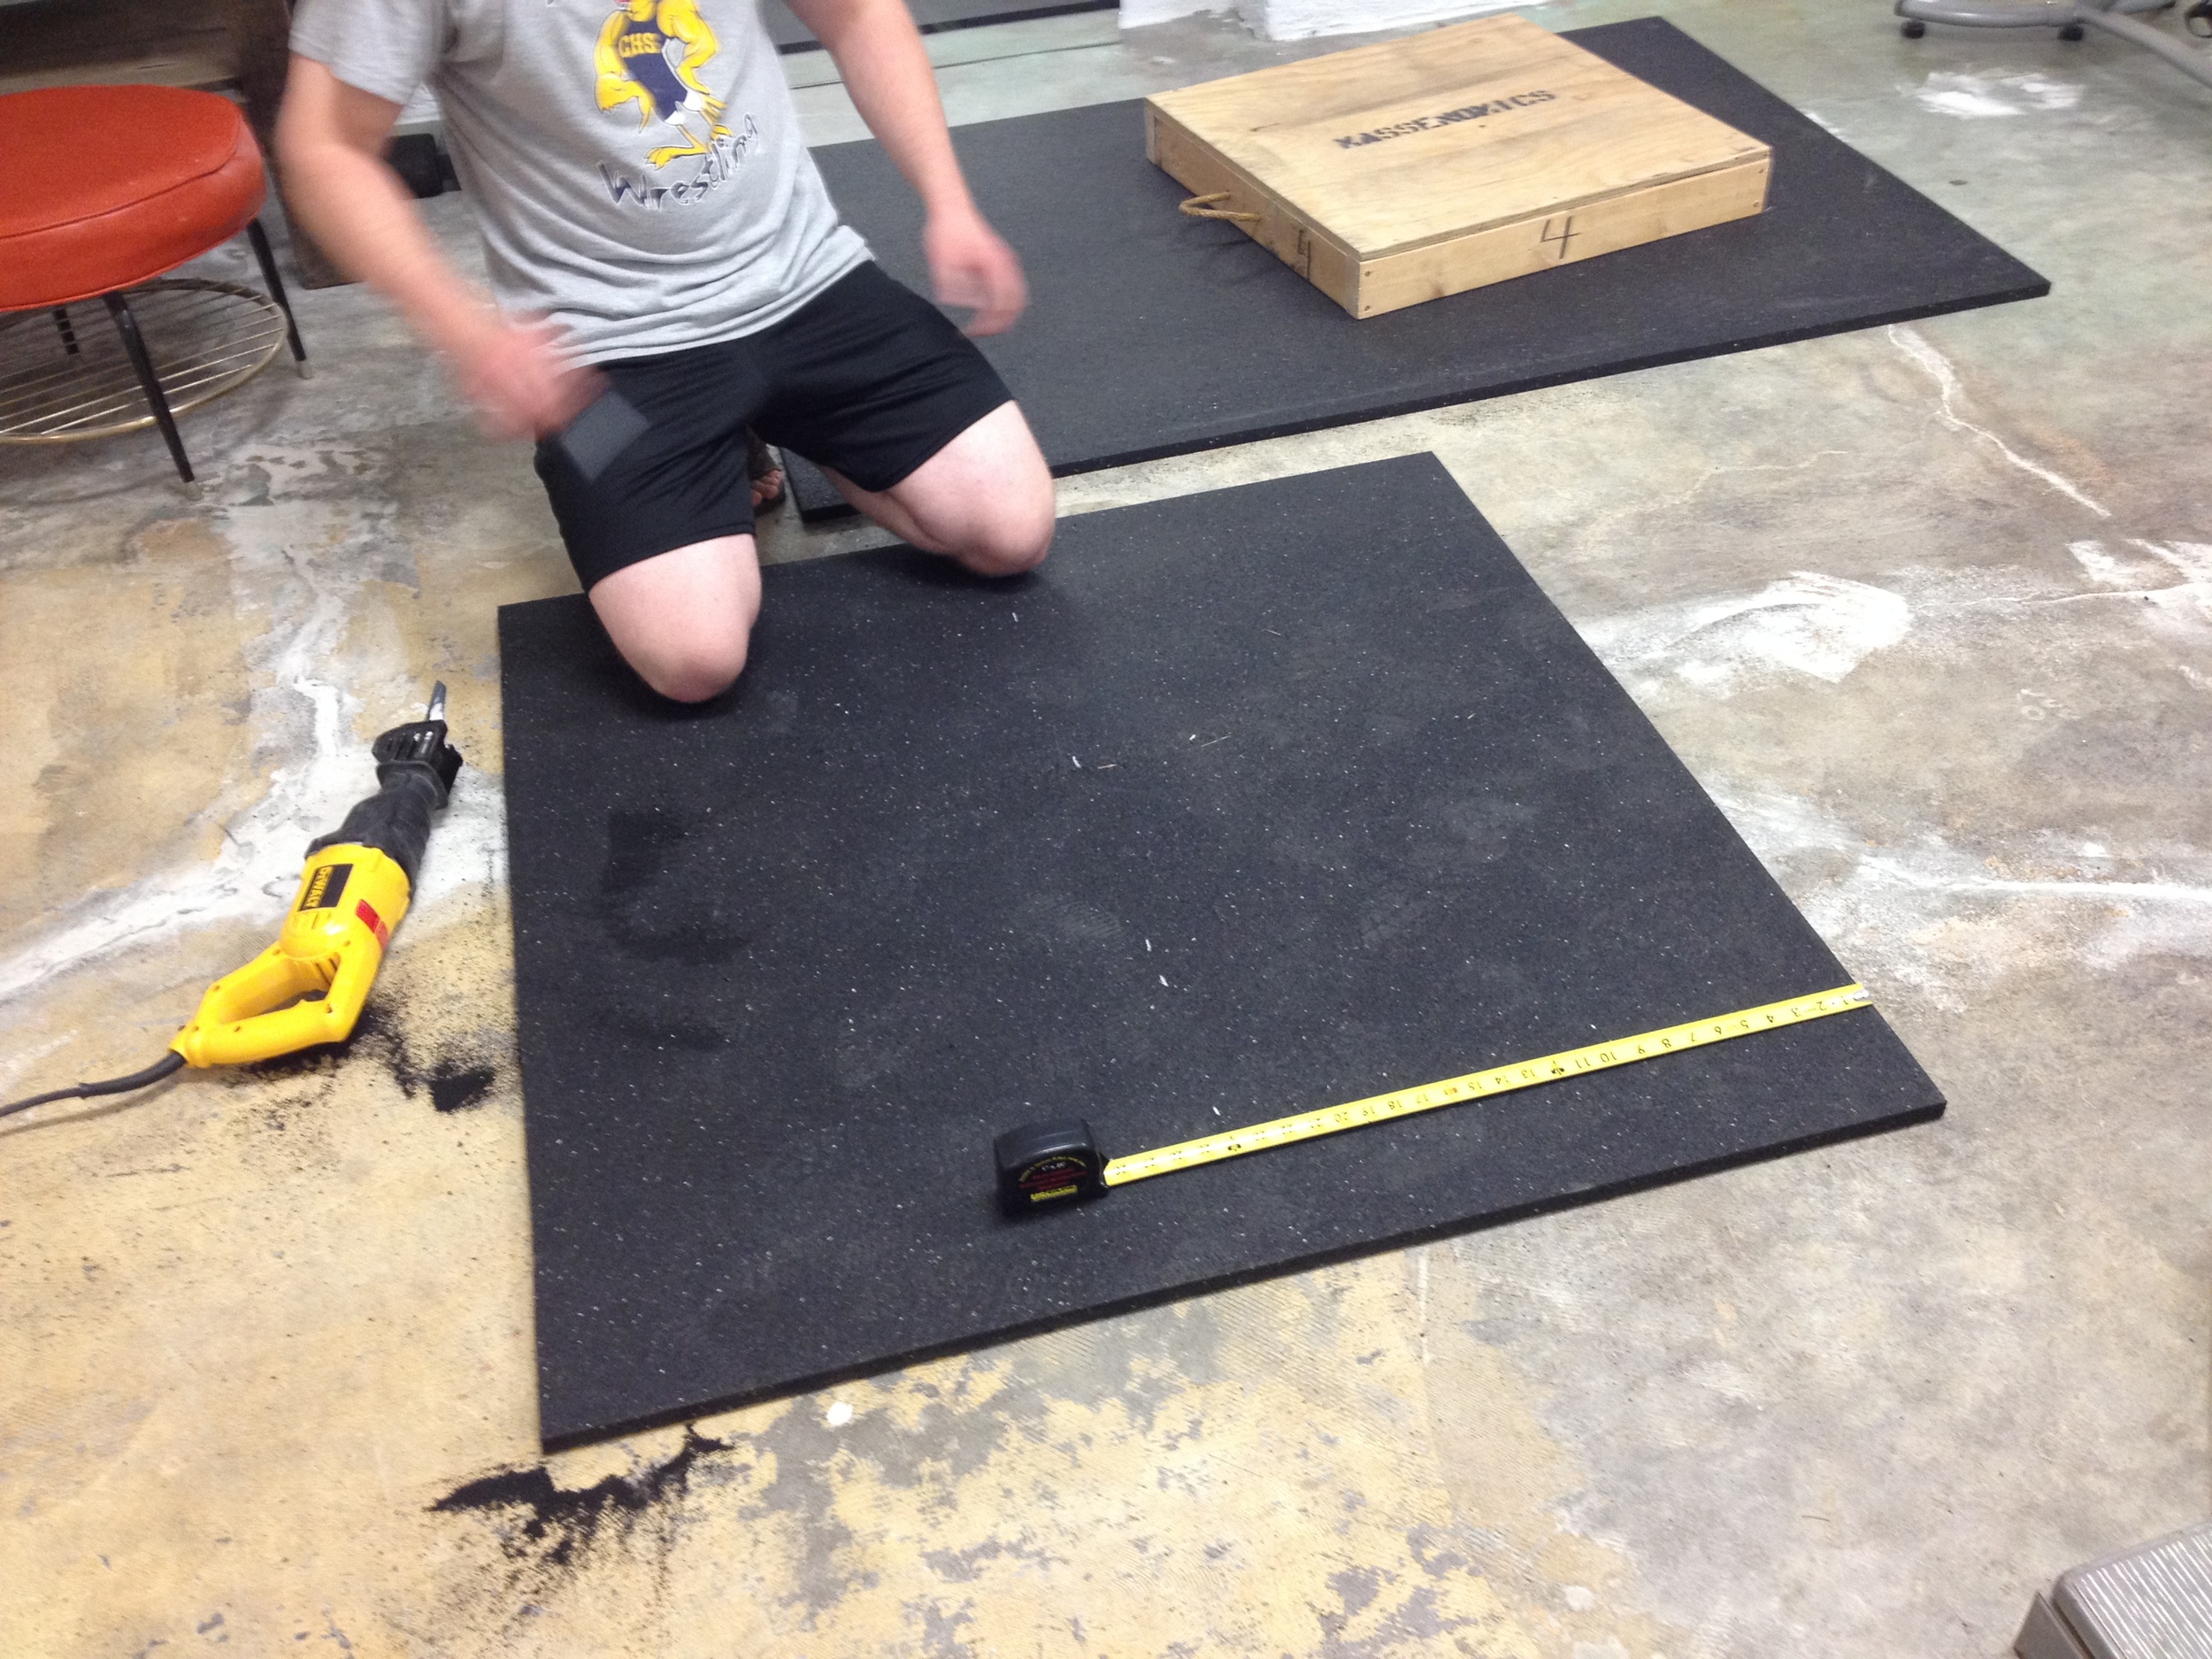
Cut the rubber
Almost there...
10. Lay the four pieces of rubber into position. Place the factory cut edge next to the 4'x8' sheet of plywood. This makes for a better finished look. Get all four mat pieces in place, then screw them down. You can use the same screws as before. Each piece will take about 6 to 8 screws.
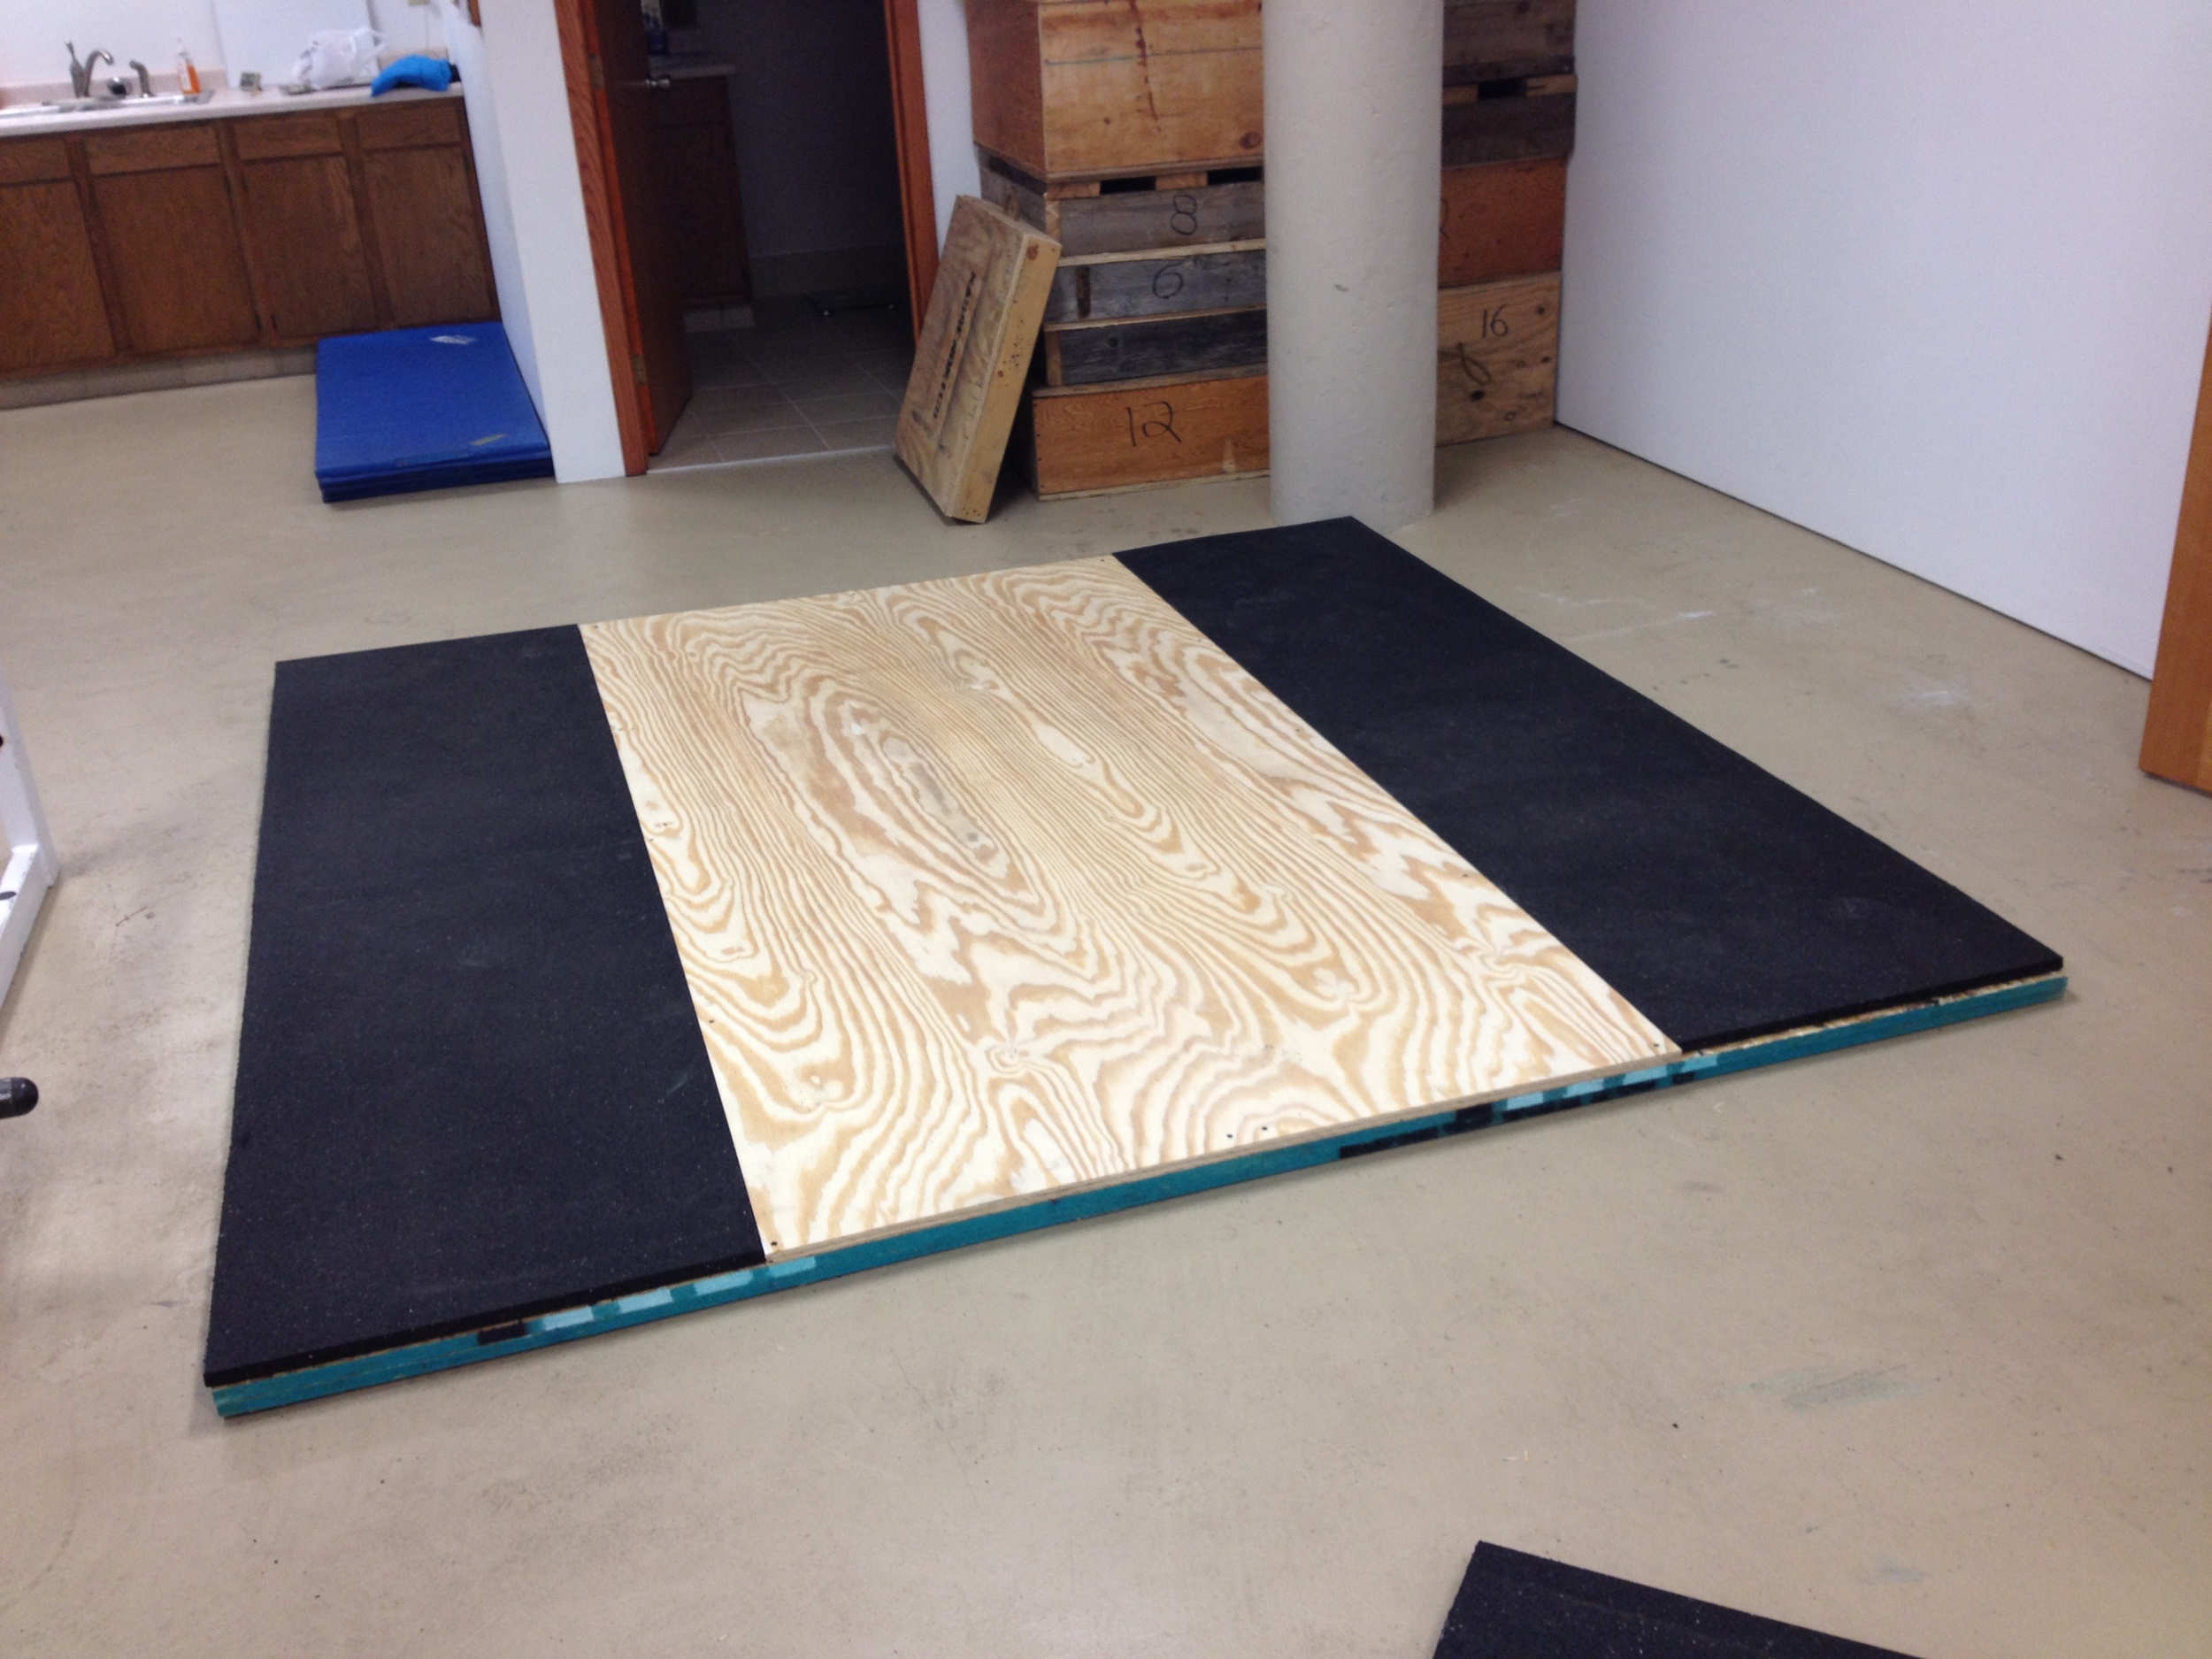
Finished product
If looking at that doesn't make you want to set a deadlift PR, I don't know what would. The last thing to do is put your rack in place. I recommend screwing it down to the platform once it is in place to prevent shifting.
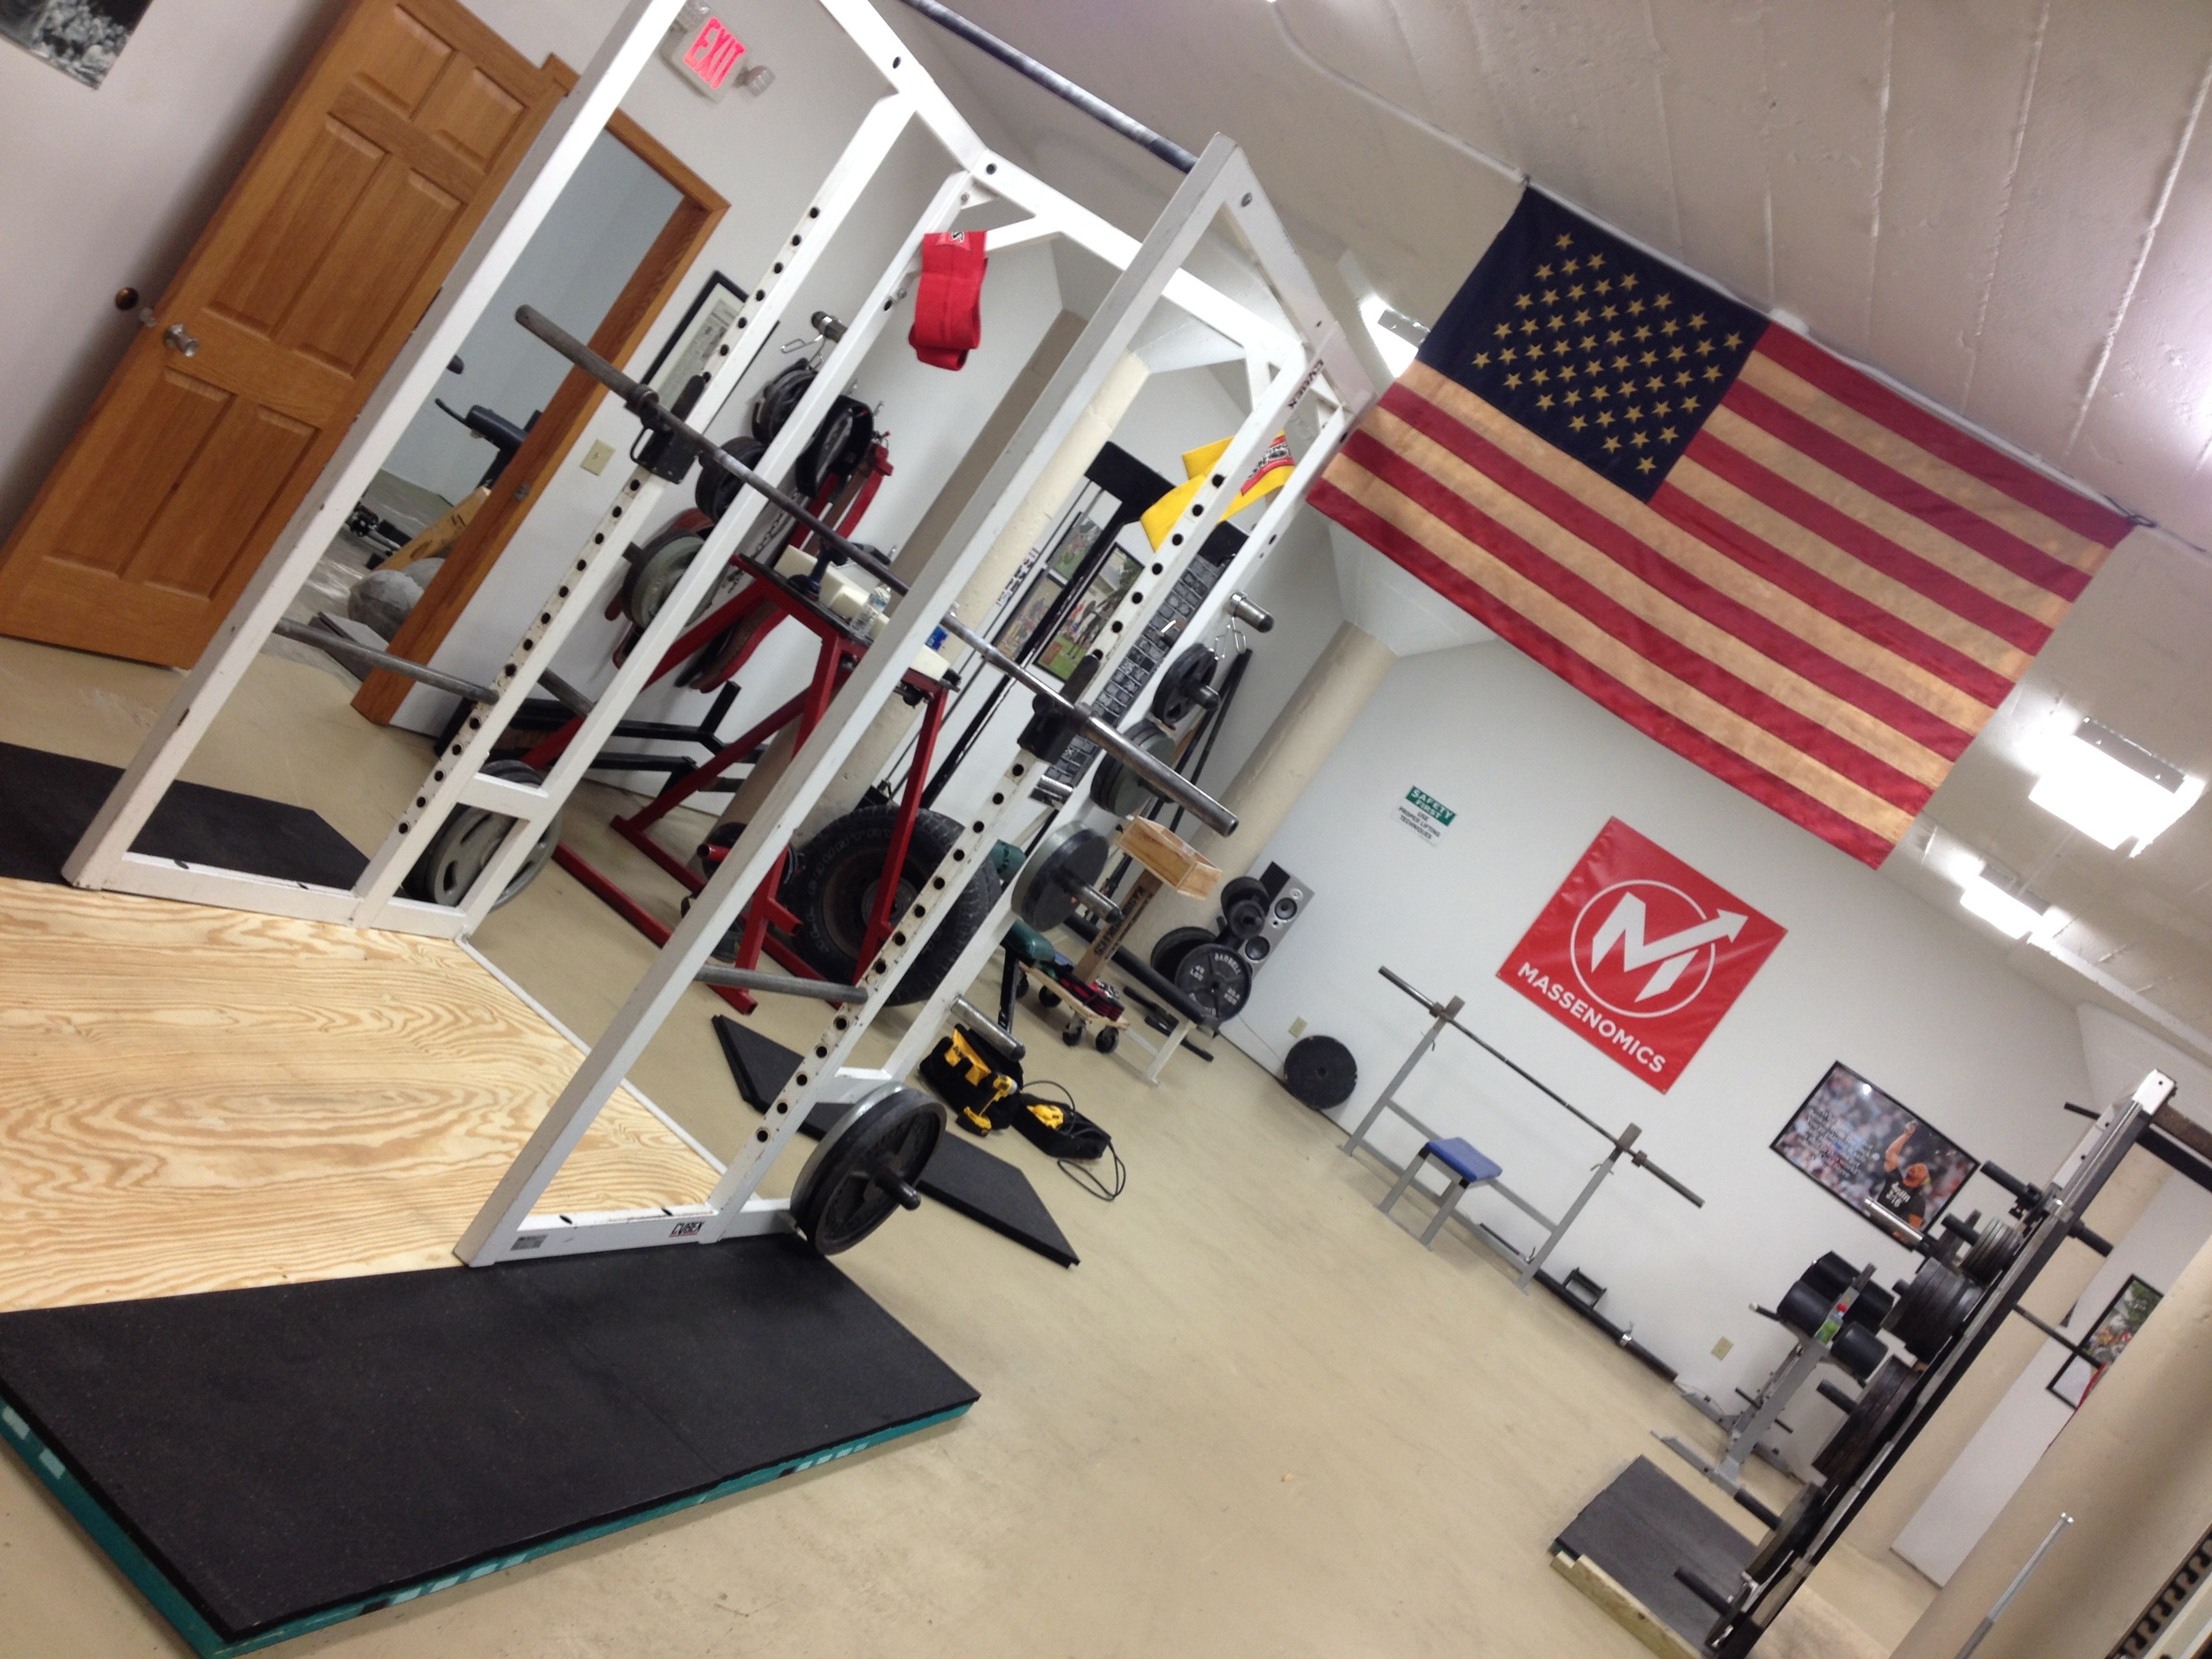
A work of art...
Additional considerations
Painting the plywood adds a cool touch. Including your logo, gym name, or some inspirational shit will be sure to help set some new PR's. If you're Bob Ross, maybe you could paint a happy little tree, or a gorgeous seascape.
We have some other DIY articles in the works, so like us on Facebook or subscribe with your email address on the bottom of the page to stay in the loop! CLICK HERE to see how we made our deadlift tires. CLICK HERE to listen to our DIY podcast episode. Also, CLICK HERE to check out our shop. If you buy something, I promise we will love you long time.
Get big, get strong, get fit, get Massenomics.